Shopping tip and a summer snack pack...
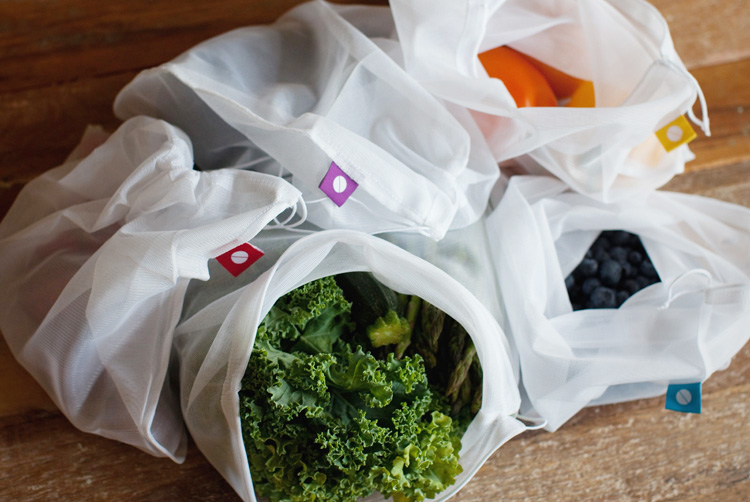
When I started the transition of feeding my family healthier foods one of the biggest struggles for me was getting through fruits and vegetables before they went old. I had an obnoxious habit of buying A LOT of produce at one time thinking that simply by having more in the house would mean we would eat more. The reality was that we could rarely get through the overflowing bins of fruits and vegetables before they wilted or rotted. It's taken some work but over time I finally feel as though I've developed a strategy for buying *just enough* produce to get us through a week. One thing that's important to me is to have a wide variety of fruits and vegetables on hand at any given time. When I saw these bags I knew they would be perfect for my trips to the farmer's market (or grocery store in the winter). When I'm shopping I try to pick at least one variety of fruit and vegetable that matches the colored tab on the side of the bag. For example, one week I might buy strawberries and a radishes in the red bag, zucchini and bananas for the yellow bag, kale and grapes for the green bag, etc... This gives me a great variety to work with throughout the week!
Here are the bags...I keep them stored in my grocery bag so I have them with whenever I go shopping. They wash up very well!

This week's produce stash:
And finally...today's snack pack which includes: spice cake cupcake, blueberries, celery and peanut butter, plum, sunbutter cookie

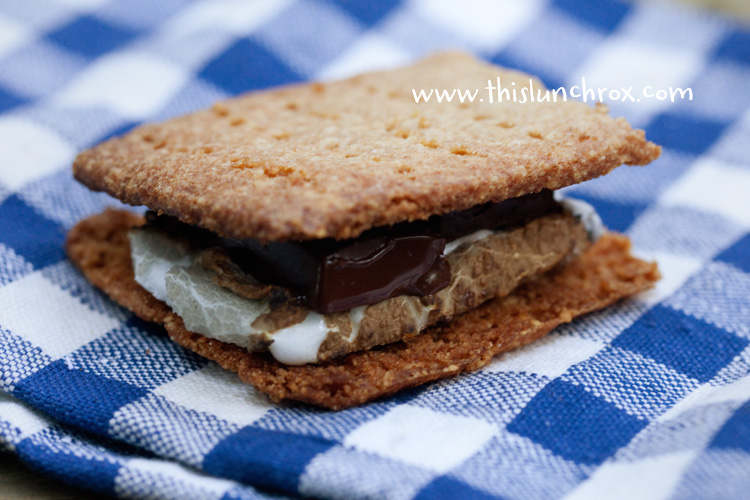
Smores...
Happy 4th of July to all of my U.S. readers! My kids love this holiday mostly because it kicks off our unofficial start to summer as most of their sporting activities are winding down which means we have a lot more time to spend up north at our cabin. While the kids love a variety of lake activities; skiing, kayaking, swimming, etc... one thing they really look forward to are the campfires. We love sitting around the fire at the end of the day and every now and again I like to surprise the kids with s'mores. I wanted to find a way to create a healthy version of thistraditional American campfire fare so I set out to find the perfect combination. After a few attempts I finally found one that is delicious and that the kids love...the best part is that it's EASY!
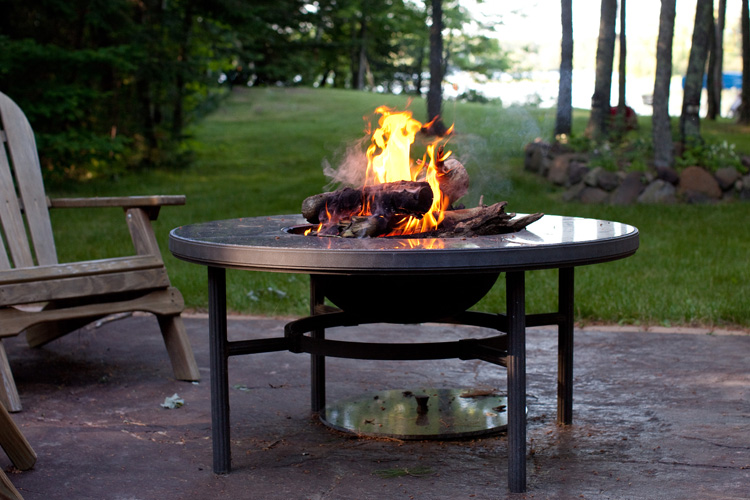
First, start with a campfire...
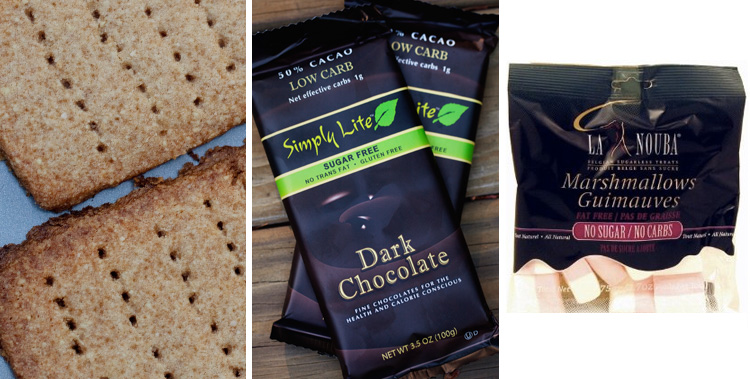
Next, pull out the ingredients...graham crackers (I use THIS recipe which is MUCH healthier than the packaged variety), sugar-free chocolate (my favorite chocolate bar is the Simply Lite Dark Chocolate bar from Trader Joe's), and sugar-free marshmallows (this particular brand is gluten free also):
Roast the marshmallows and assemble a pile of yummy goodness...enjoy!!
Strawberries & A Summer Snack Pack...
Nothing says summer like a crate full of fresh strawberries in the fridge! One of my favorite things to do in the summer is to go to a nearby strawberry field for hand-picked strawberries. These sweet and tasty little treats are a far cry from the ginormous, waterlogged and tasteless strawberries sold in most grocery stores. The boys love it when I come home with a bucket of berries and they love the goodies I make with them such as; strawberry smoothies, strawberry popsicles, strawberry fruit leather....lots of strawberry goodness. But most of all, they love eating them straight out of the bucket which makes them a great "quick and easy" snack on hot summer days.
Speaking of snacks, at the beginning of the summer I knew I needed to find a solution to the snack situation. The summer season is the busiest time of the year for me with my job and we also spend as much time as we can at our cabin. Between my work and traveling to the cabin it is VERY easy to fall into the convenience trap when it came to snacks if I don't plan ahead. With the boys running in and out between bike rides, practices and friend's houses and me immersed in work it's easy to lose track of what the kids are eating on any given day. So on busy days at home or when we're up north at the cabin I've been putting together little snack packs in the morning. These little packs are filled with a variety of snacks the boys can enjoy throughout the day. When the boys need a little something between meals they know they can go to their snack pack and grab whatever they want and I don't have to stop what I'm doing to get snacks ready. The boys know the snack pack is their snack for the day so they don't eat everything at once. Typically they pick one thing out of their snack pack and leave the rest in the refrigerator. When they come back for another snack they have whatever is left in their snack pack to choose from. This has been a great system for us and the boys love having the variety to choose from when it's snack time.
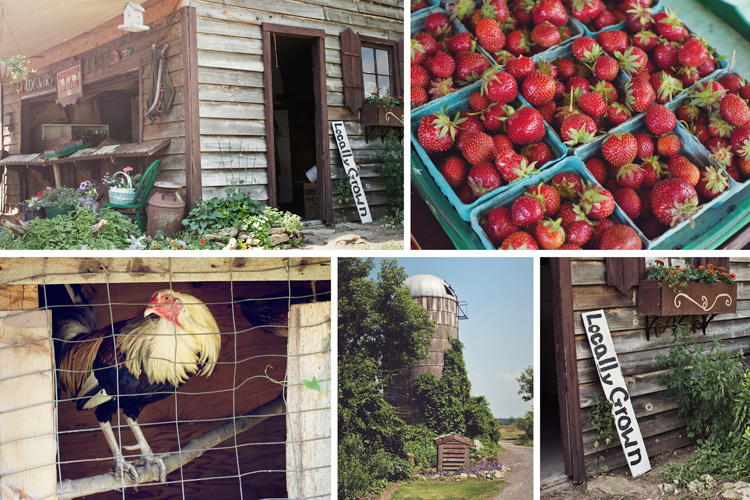
Here are a few pictures from our local strawberry field:
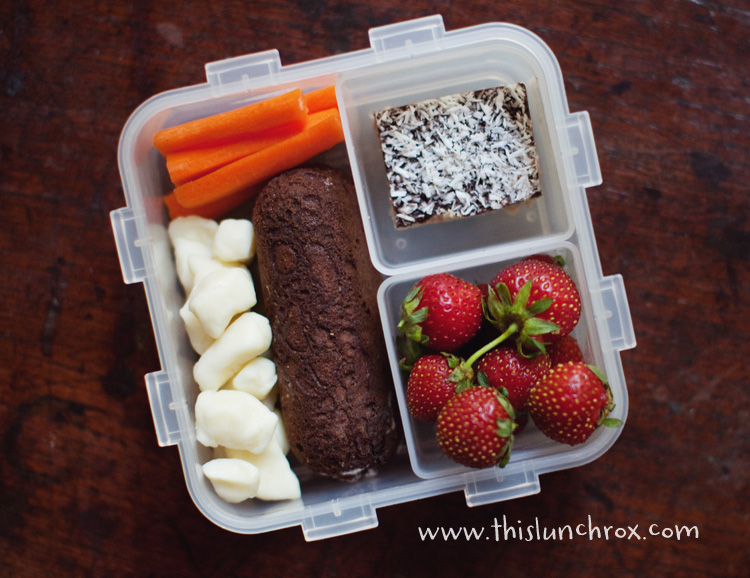
Today's snack pack includes: strawberries, a chocolate "Twinkie" (recipe below), Wisconsin cheese curds, carrots, energy bar (recipe below)
"Twinkie" (recipe from Maria)...you can click on her name and read some really interesting facts about this traditional kid's snack:
1/4 cup coconut flour
1/4 tsp Celtic sea salt
1/2 tsp baking soda
3 eggs
1/3 cup Truvia (or erythritol and 1/2 tsp stevia glycerite)
1/2 TBS vanilla
1/4 cup butter or coconut oil
CHOCOLATE OPTION: add 3 TBS cocoa powder
Preheat your oven to 350 degrees F. In a large bowl, mix all the dry ingredients and then start adding all the wet ingredients to the dry mix. Blend until it is light and fluffy. Grease the Twinkie pan (click HERE to purchase on amazon.com) (or cupcake pan if you don't have a Twinkie pan). Pour the batter into the pan and fill 3/4 to the top. Bake for 11-12 minutes, or until a toothpick comes out clean. Remove from oven to cool completely.
Creamy Filling:
1/2 cup heavy cream
1/8 cup Truvia (or a few drops of stevia glycerite)
Whip the cream until light and fluffy, add in the sweetener. Place the cream in adecorator tool or a ziplock bag with a hole cut into the corner and fill cakes in three areas along the bottom of the cake.
No-Bake Energy Bar (also from Maria)...again she has GREAT information about what makes these a great snack option:
1 cup raw sunflower seeds
1 cup raw pecans
4 TBS Coconut Oil
1/2 cup coconut flour
4 TBS Truvia or Erythritol
1/2 cup raw sunflower seeds
2-4 TBS natural peanut butter
1 TBS vanilla extract
Dried, shredded unsweetened coconut
Chocolate Topping:
4 TBS coconut oil
8 TBS cocoa powder
2-3 TBS Truvia
Grind up 1 cup of sunflower seeds and the cup of pecans in food processor or coffee grinder and pour into bowl. Add coconut oil, coconut flour, sweetener, almond butter, vanilla flavoring, 1/2 cup sunflower seeds and mix all together. Pour into square casserole dish and press mixture down firmly.
Sauce:
In small saucepan, melt 4 tablespoons coconut oil and mix in cocoa and sweetener until thickened. Pour chocolate sauce on top and sprinkle with shredded coconut. Refrigerate for about 25-35 minutes. Cut up into squares and enjoy!
Summer Snacks...
As you may have guessed from the lack of blog entries over the past few weeks, things have been a little hectic around here with summer activities. The other day as I was grabbing a snack for my boys as we headed out the door to baseball I stopped for just a moment and took note of the difference in our snack choices this year over year's past. Before I transitioned the way I fed my family our kitchen cupboards were lined with rows of bright, cartoon-filled boxes & bags filled with fun shaped food my kids loved to eat! While I knew those snacks weren't the best choices for my kids I didn't think they could be that bad. In fact, some of the snack packs actually looked quite healthy. Boy, was I wrong...
After doing some research I found that most of the packaged snacks I was feeding my kids on a daily basis were loaded with trans fats, BHT (which has been banned in most countries including Japan, England & Australia just to name a few), food dyes, and of course sugar...LOTS and LOTS of sugar! Remember, it is recommended that children (ages 4-8) consume no more than 12 grams of sugar/day and teens should limit sugar to 21-33 grams/day. It's amazing how much sugar my kids were consuming on a daily basis, much of which came from those convenient snacks I relied on to tide them over until meal times.
As if the excess sugar wasn't enough, when I looked deeper into the ingredients list and found that most of the foods contained trans fat I was mortified. Some of you might rememberthis post where I talked about the importance of Omega-3's to help keep kids' brains functioning at full capacity. I've since learned that when children consume foods that contain trans fat it goes and parks itself in spots reserved for Omega-3's. Maria wrote about this topic here saying "When this happens, our neurotransmitters responsible for focus, mood, and memory have a hard time finding and recognizing their receptors due to the inflammation of the membranes on the brain cells caused by the consumption of trans fats."
Now that we've shifted the way we eat in our home, those convenience snacks no longer line the shelves of our cupboards. Instead I have jars of snacks I keep stocked with goodies along with a lot of fruits and veggies so I always have healthy snacks available when needed. Because the snacks are made with all kinds of healthy goodness the kids stay full longer and don't spend the day begging for snacks...a nice change of pace around here.
I thought I'd spend some time over the next few weeks posting summer snack ideas. This week our snack jars are filled with the following: chocolate no bake protein bites, granola bites, roasted nuts, granola, almond flour chocolate chip cookies (recipes below):
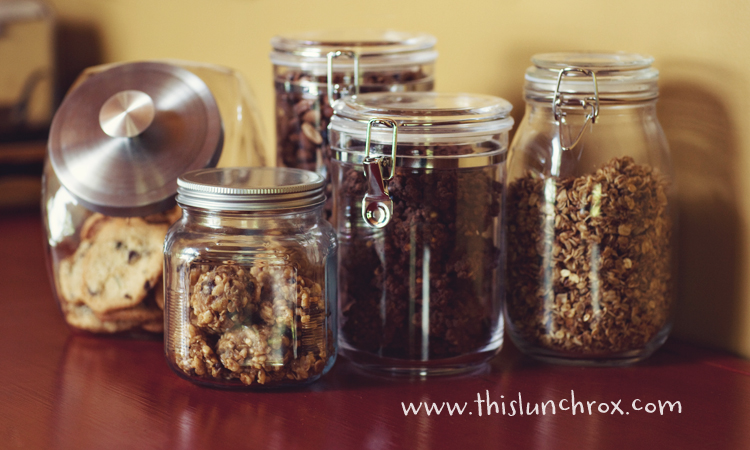
(From left to right):
Almond Flour Chocolate Chip Cookies:
Recipe adapted fromwww.comfybelly.com
2 1/2 cups of blanched almond flour
1/4 teaspoon of salt
1/4 teaspoon of baking soda
8 tablespoons of butter (if you want the cookies a little chewier add 1-2 TBS additional butter)
1 tablespoon of vanilla
1/2 cup of honey (I use sugar-free honey from Nature's Hollow)
1 cup of chocolate chips (I usesugar-free chocolate chips)
1. Preheat your oven to 350 degrees F.
2. Combine the dry ingredients in a bowl and blend well.
3. Add the wet ingredients and blend well again.
4. Prepare baking sheets with parchment paper, and drop a spoon full of cookie dough on the parchment paper, spacing the cookies about 2 inches apart.
5. Bake for about 15 minutes, or until they start to brown on the edges.
Granola bites (adapted from a Weelicious recipe):
1/2 Cup Peanut Butter (I use Trader Joe's Valencia Peanut Butter with Roasted Flaxseeds)
1/2 Cup sugar-free honey
1 Cup Whey Crisps
1 1/2 Granola (I make my own...see recipe below)
1/4 Cup dried fruit such as; cranberries, cherries, blueberries and/or raisins (I use dried fruit VERY sparingly in my house, but they are a nice addition to this recipe)
1. Place the peanut butter and honey in a small saucepan over low heat and warm until it becomes smooth and combined.
2. Place the remaining ingredients in a bowl and stir to combine.
3. Pour the warm peanut butter mixture into the bowl with the granola mixture and stir to combine.
4. Roll into 1 inch balls (I used a mini ice cream scooper to scoop out each portion, but you could also use a tablespoon) .
5. Serve or store in an air tight container
Maria's No-Bake Chocolate Protein Bites:
3/4 cupTruvia
1/2 cup cocoa
1/2 cup coconut oil or butter
1/2 cup vanilla orchocolate almond milk (optional)
1/2 cup natural Peanut Butter
1 tsp vanilla
3 cupschocolate whey crisps
1. Combine the first 4 ingredients in a saucepan and bring to a rolling boil for 1 1/2 minutes
2. Add the other three ingredients, stir well.
3. Drop by tablespoon on wax paper.
4. Let cool completely.
Granola (this is great by itself with a splash of unsweetened vanilla almond milk or sprinkled on smoothies, etc...):
2/3 cup honey (I use sugar-free honey)
1 Tbsp. molasses
1/3 cup oil (I use coconut oil...you can find this in the whole foods section at the store)
5 cups oats (old-fashioned rolled oats...I use Bob's Red Mill)
1 cup ground up flax seed (I buy fresh flax seed and grind in my blender just before using)
1 tsp. cinnamon
1. Mix honey, molasses, and oil in a saucepan. Heat until melted and mixed.
2. Combine oats, wheat germ, and cinnamon in a 9x13 pan
3. Pour honey mixture over dry mixture and mix well.
4. Bake at 375 degrees for 10 minutes. Stir and cook for about 5 more minutes.
5. Let cool before eating.
Roasted nuts:
mixed nuts of choice (I like almonds and walnuts)
water
sea salt
1. Soak nuts in a large bowl with water and a few pinches of sea salt overnight.
2. Drain nuts and place on a baking sheet.
3. Bake at 200 degrees for 18-24 hours (or use a food dehydrator)
** Please note: If peanut allergies are an issue you might consider swapping out the almond flour for coconut flour and sunbutter in place of the peanut butter in some of the recipes I post.
The Case of the Missing Baseball Card (and other exciting news)...
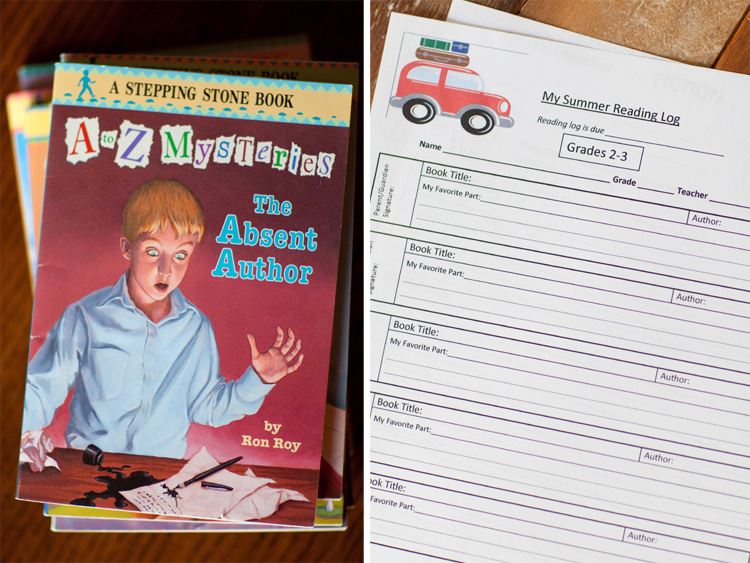
With summer of course comes summer reading activities. As a former teacher I understand all too well how important it is to keep my kids reading over the summer months. However, the older they get and the more involved they are in their sporting activities, the harder it is to keep them focused on books. Each summer I do my best to pull together a reading program that keeps the kids excited and motivated throughout the summer. My oldest son was showing a lot of interest in mystery books toward the end of the school year. He was more than halfway through the A-Z Mystery series by the end of the year and said he hoped to finish the rest over the summer. Knowing he will likely finish that series within the month of June I wanted to be prepared by having more books on hand that would be of interest to him. I did some digging on-line and found some great resources that I thought I'd share for other parents of kids who are into mystery books! Click here, here and here for a great assortment of mystery book options. One of the best "general" book lists I've found so far is here. I just love how they have categorized the books by topic or interest...if you click on any of the images it will take you to a list of related books your reader might also enjoy. I also printed a reading log for my boys from this site to keep track of the books they've read over the summer along with graphic organizer activities that are so very helpful for emerging readers.
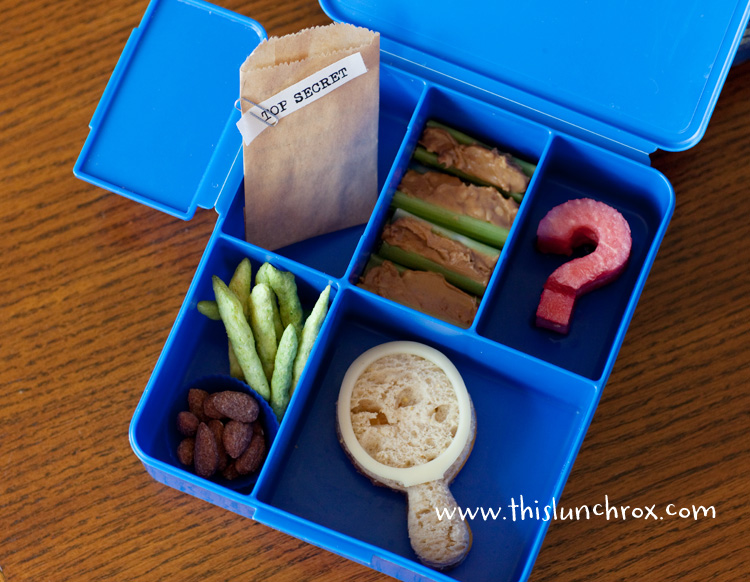
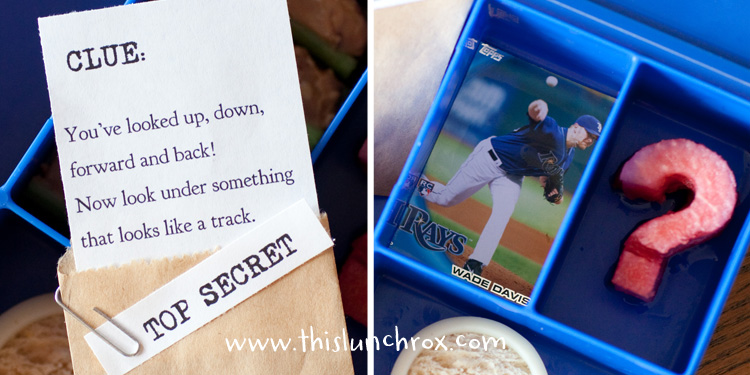
We officially started our summer reading program this morning and I wanted to do something fun for the boys. When they woke up I told them I had a very important case for them. I asked if I could hire both of them to solve "The Case of the Missing Baseball Cards". They learned that I had two baseball cards in my possession this morning and sometime between making breakfast and going upstairs to get ready for the day I misplaced the cards. The boys went off in search of the cards asking A LOT of questions about where I'd been and what I'd done so far this morning. My oldest son was getting close when he started asking about the lunch boxes as he put together his timeline of activities. I think he might be onto something.
Today's "detective themed" lunch includes: roast beef, white american cheese sandwich, watermelon slices, almonds, snap peas, celery & peanut butter
If you have kids entering 2nd or 3rd grade and they aren't familiar with the A-Z mystery series you might give it a try. My son LOVES this series!
Now, in other EXCITING news....
I received word yesterday that This Lunch Rox is being featured on Jamie Oliver's Food Revolution Blog as June's Blog of the Month! This is such an exciting thing for me as I truly had NO IDEA when I started this blog that there would be so much interest. I've been having a blast with this project and to be recognized by the Food Revolution Team, a team I so admire for their work in bringing awareness to the travesty of most school lunch programs, is truly an honor. A huge thank you to all of my readers for your continued support and the words of encouragement!


Sports camp...
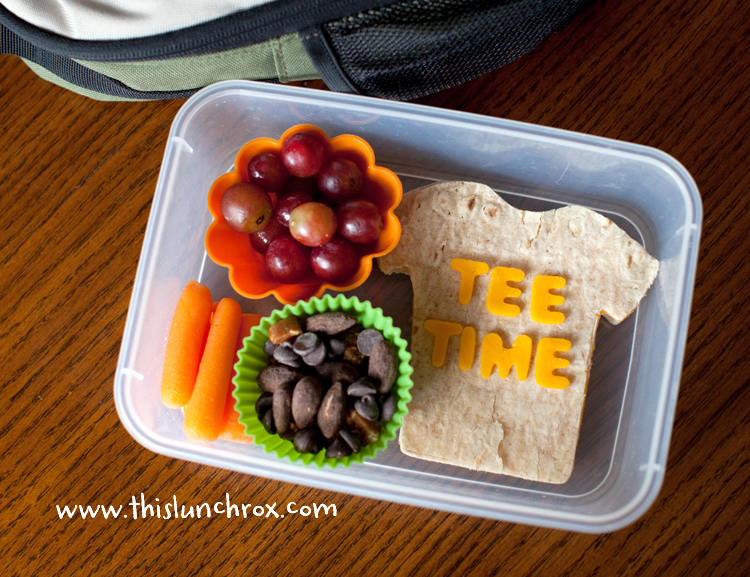
The boys are kicking off the start of summer break with a few sports camps. This is something they have been looking forward to for months and so far the camps are turning out to be everything they hoped for and more. We couldn't be happier with the camps we chose for the kids this year and have so much appreciation for the organizers who put together such great programs. The kids are worked hard from the second the activities start right up until the end and the boys are loving every minute of it! One day out of the week the boys have to go straight from golf to hockey so they have to eat lunch on the go. Today is one of those days so I put together a fun little lunch for each of the boys to enjoy between camps.
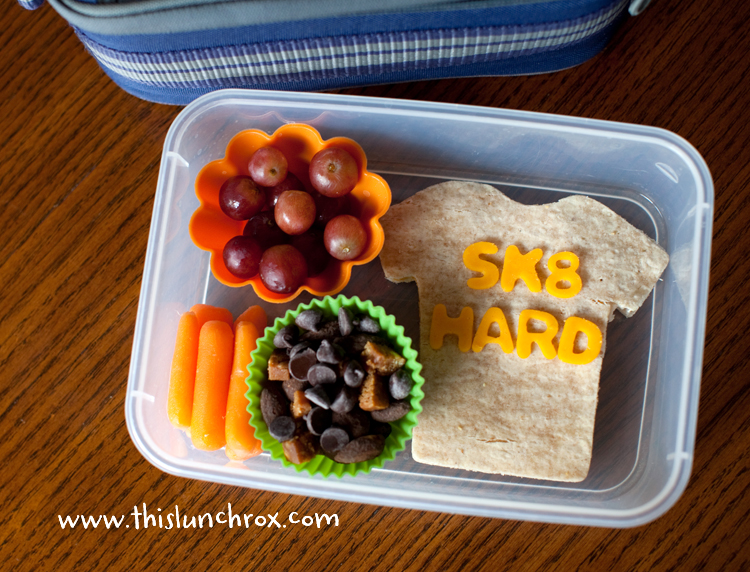
Today's lunches include: turkey, bacon & cheese sandwich on Joseph's Lavash bread, grapes, carrots, trail mix (nuts, unsweetened chocolate chips, Quest protein bar cut into chunks)
Here's one for our little golf lover:
And one for our hockey lover:
Lunch Pack...
Well, it's officially summer here and the boys couldn't be more excited. With summer comes a lot of activity around our house so I've been trying to plan some quick and easy portable lunches that we can take on the go. Prior to our clean eating transformation my boys loved the ever popular lunch packs...you know the one's in the bright yellow box! With a whopping 1100 mg of sodium, an ingredient list so complex it almost looks like a foreign language, and having it packed full or preservatives made from fermented food those little yellow boxes are no longer an option for my kids. The concept behind the little lunch pack is a good one so I wanted to come up with a healthy version.
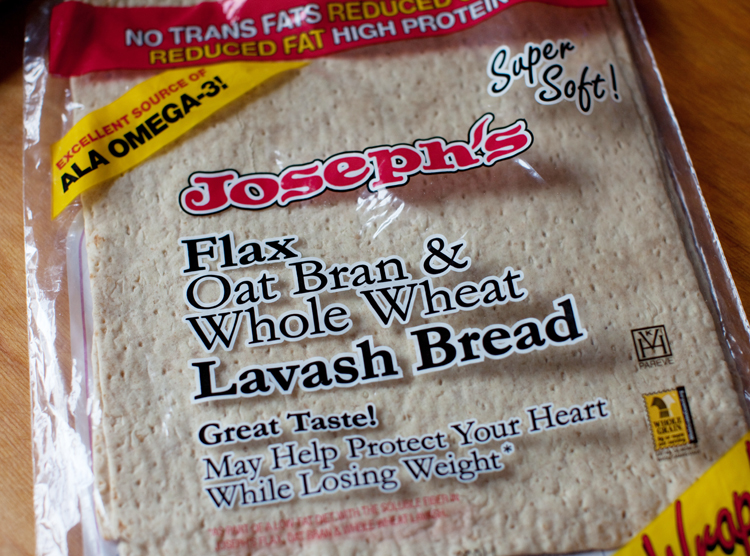
I found this cracker recipe that my boys love so I used that as the base for this lunch pack. The crackers are so easy to make and I love that I can make just a few at a time...no more stale boxes of crackers in my cupboard! Yippee!! First start with one piece of Joseph's Lavash Bread .
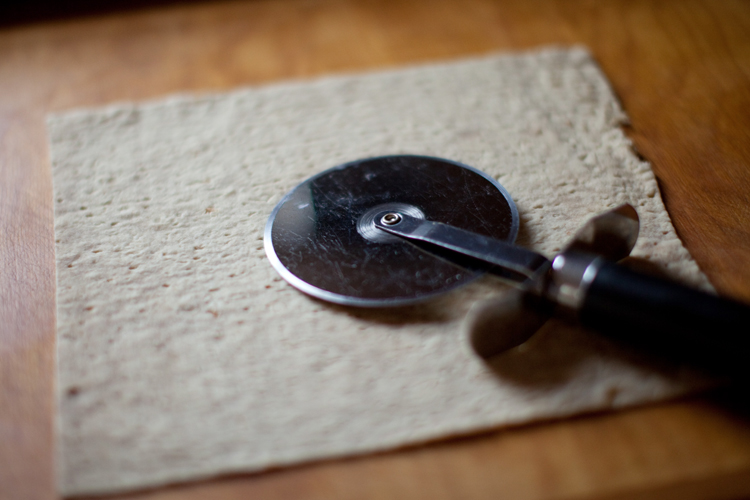
Using a pizza cutter, cut the Lavash Bread into squares.
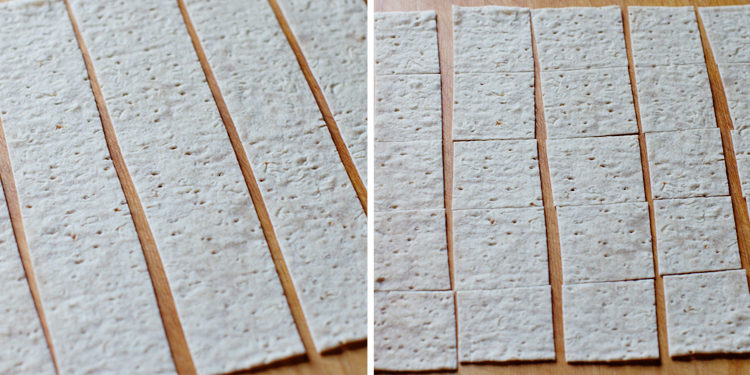
I cut vertical lines and then go back and slice horizontal lines to make squares.
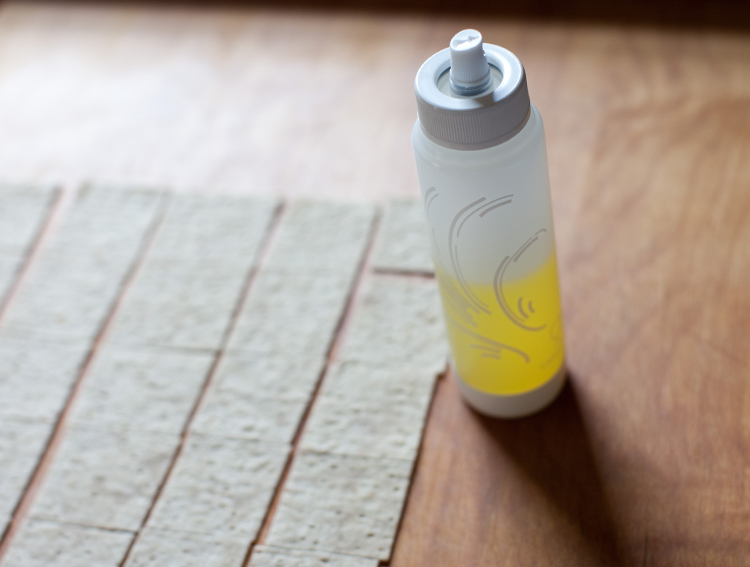
Using a non-aresol oil pump, spray the Lavash Bread with olive oil.
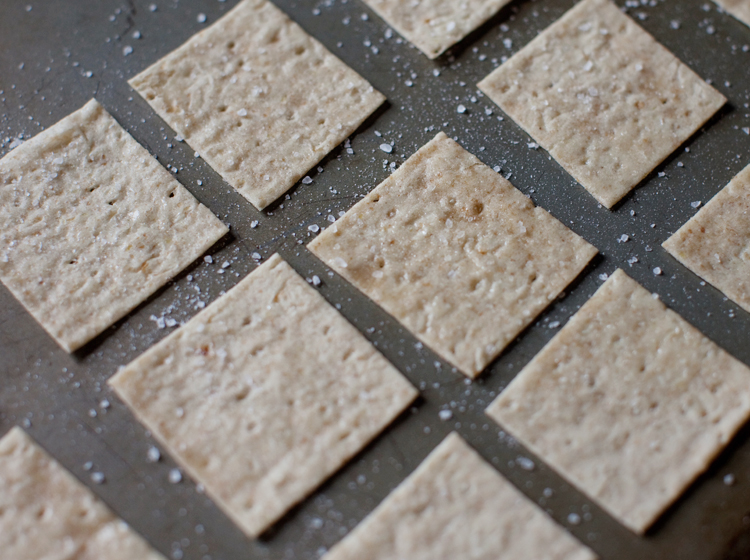
Place squares on a baking sheet and sprinkle with freshly ground sea salt. Bake at 325 for 10-12 minutes or until edges are light brown.
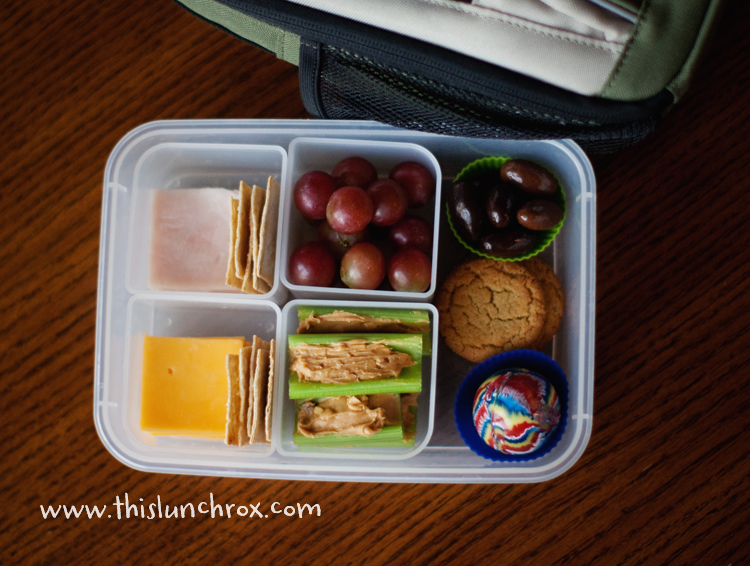
I made today's "lunch pack" using a variety of Lock and Lock boxes and containers. It includes Lavash Bread Crackers, nitrite-free turkey, cheese, grapes, celery and peanut butter, Trader Joe's sugar-free chocolate covered almonds, Trader Joe's Gingersnap cookies, and a bouncy ball (instead of a fun-size bag of candy you would find in the little yellow box.)
Road Trip...
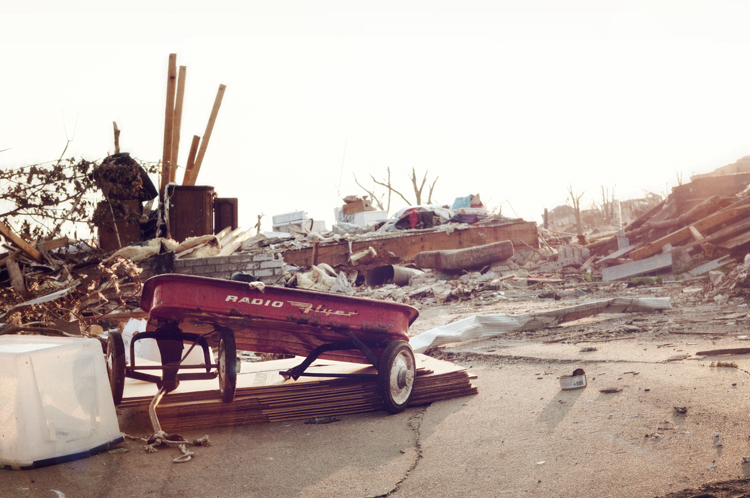
I hope you'll all forgive my absence here on the blog for the past few days. After seeing the news of the tornado in Joplin, MO I knew I wanted to do something to help. So, this past weekend I made the trip down there with my dear friend Nichol. Neither of us knew exactly what we'd be doing once we arrived, but we knew we'd find some way to help. On our first night there we drove around the city letting the gravity of the scene sink in and spent some time chatting with people who were in and around the "zone". Everyone we came in contact with looked completely exhausted as many of them have been working around the clock for three solid weeks only stopping for a few hours of sleep wherever they can find a pillow. As we headed out on day 2 the temps were hovering around 105 degrees and most of the "zone" was still without power. Nichol and I decided that our mission could be to deliver gift cards for both the workers and families to enjoy a meal indoors in an air conditioned restaurant. We pulled our car over and put out a call for action to our friends on Facebook and Twitter and within 20 minutes we had over $300 in donations. In an hour we had nearly $700 and by the end of the day we were well over $1000 in donations! We spent the entire day walking the streets of Joplin passing out gift cards to the 100's of people working tirelessly to rebuild the city of Joplin. My favorite part of the day was when Nichol and I stopped for lunch a crew of volunteers came in dripping with sweat and looking completely exhausted. Without saying a word to the group we told the cashier that we were covering their lunch for the entire crew. Nichol and I loved seeing the smiles on their faces when the cashier told them their meal was paid for, but we were moved when one of the men in the group started crying as he expressed his gratitude.
Looking back on our trip, I can't think of a better way we could have spent our time in Joplin. Feeding people around me is something I love to do and it was a great way for us to serve the city of Joplin. Something tells me I'll be back there again. To my new friends in Joplin, until we meet again...
P.S. I'll be back tomorrow with a summer lunch pack idea so stay tuned! :)


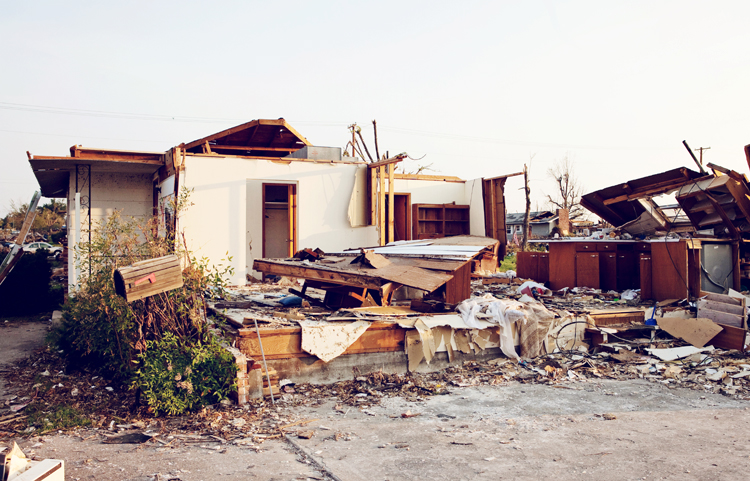
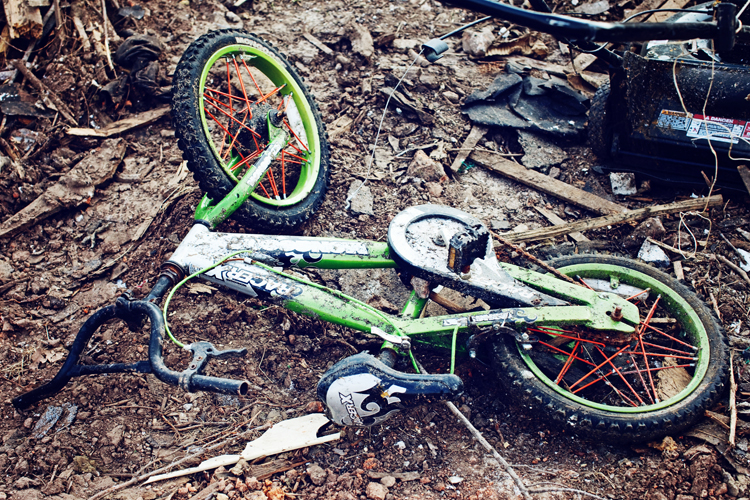


And just to give you an idea of just how many gift cards we distributed...
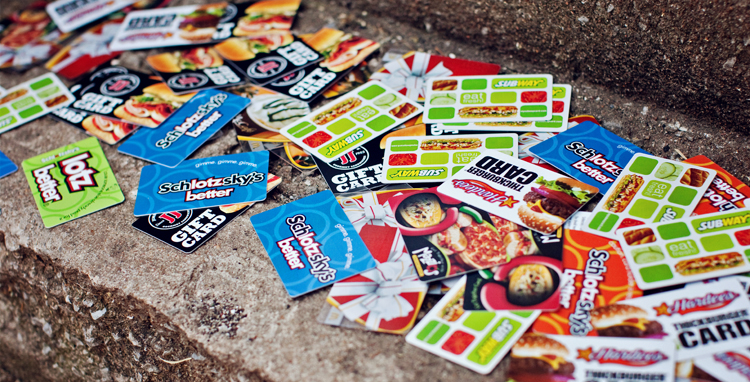
Around the World...
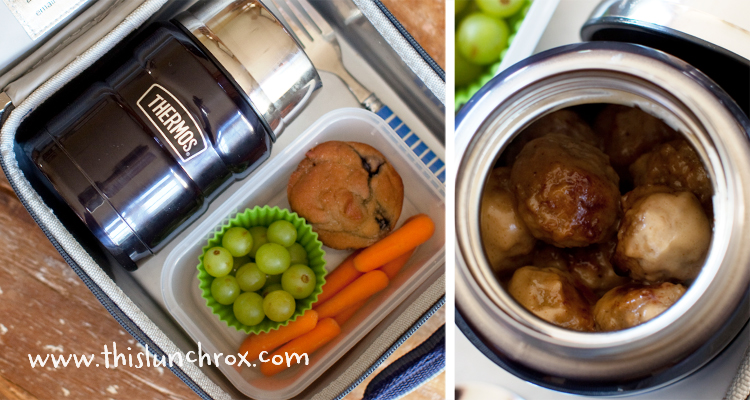
Last night we continued our "Around the World" food tour with my son's favorite meal...Swedish Meatballs. This is something I make at least once a month and I've learned to make A LOT at one time a) because all of my boys (including my husband) go for seconds and sometimes thirds at dinner b) they make a great "quick-and-easy" lunch the next day. The recipe calls for homemade meatballs but I've been using Trader Joe's beef meatballs to save on time and the boys love them just as much, if not better than when I make them from scratch.
Today's lunch includes: Swedish meatballs, almond flour blueberry muffins, grapes & carrots
Continents...
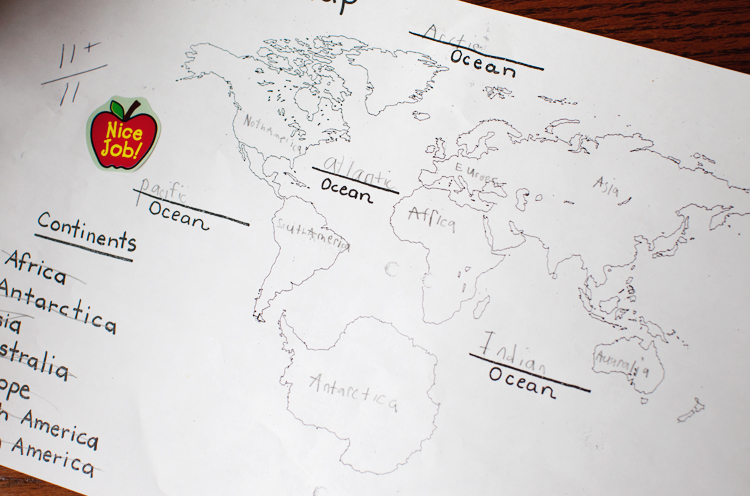
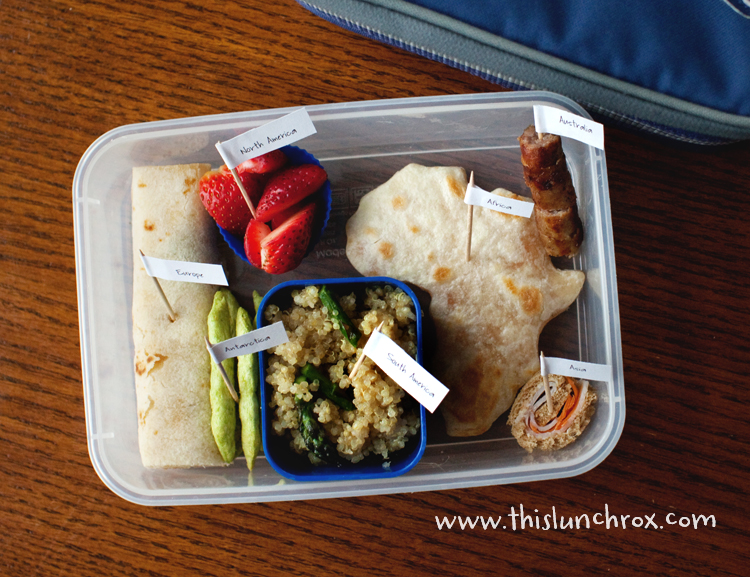
Last week my son's class spent time learning about the 7 continents of the world. As a former geography teacher this was just the type of lesson I've been looking forward to ever since my little man started school. Over the past week we've spent time reading about and discovering unique facts about each of the continents. One thing I thought would be fun was to research different foods that originated from or were customary to the different parts of the world. We learned that if we traveled to Thailand we could buy maggots, grasshoppers, and cockroaches from a street vendor as a little afternoon snack. Or, if we were in Northern Australia we could stop for a tasty treat consisting of green ants! We also found some traditional delicacies from around the world that were a bit much for our western taste and I promise I won't go into detail about them here...I don't want to scare you away.
At any rate, studying the different foods from around the world gave us the perfect opportunity to learn more than just what people eat on various continents. It helped my son understand the climate and conditions that allow certain foods to grow in certain areas and also how in Antarctica, where it's too cod to grow anything, people have to rely on preserved food such as dried foods such as beef, fruit & veggies to survive. All in all we loved this unit and I can't wait for more geography related lessons!
Today's lunch features foods that represent each of the 7 continents: Lefse (Europe), Dried Peas (Antarctica), quinoa (South America), strawberries (North America), sausage on a barbie (Australia), "sushi" (Asia)...made with turkey/carrots rolled up in a slice of bread, "injera" (Africa)...injera is a traditional African flatbread that is often used as a utensil to scoop up food. (I didn't have time to make real "injera" but here is a great recipe for anyone who wants to try it.)
Way to go, kiddo! Mommy's proud of you!
